

Configure the journey
Bud Connect allows you to make a series of different configurations for the Connect user journey to suit your use case. Below, we outline each of these configurations, how you can use them, and the impact each of them has on you and your customers. All the configurations in this guide are made when calling POST v2/open-banking/authorisation-gateway-url (here).
Provider configurations
Here, we give an overview of the screen configurations you can make to allow the customer to select a banking provider. The configurations include filtering, specifying one provider, or a list of providers.
TO SPECIFY ONE PROVIDER (REMOVE SELECT-A-PROVIDER SCREEN)
You can specify one banking provider using the following API call.
POST /v2/open-banking/authorisation-gateway-url
{
"redirect_url": "https://thisisbud.com/",
"providers": ["capitalone"]
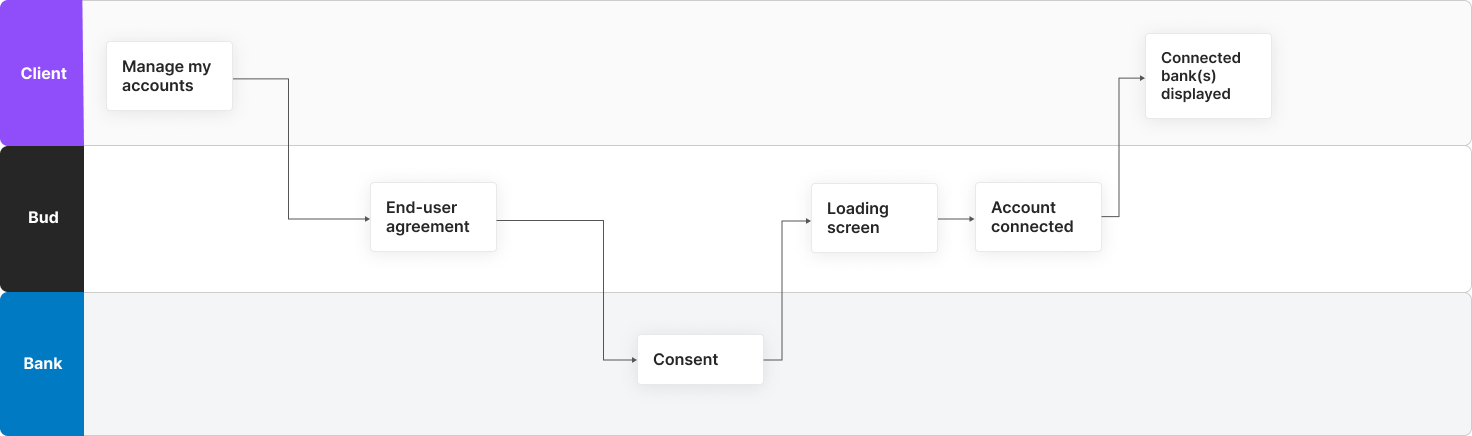
}By specifying the banking provider, the customer will skip the ‘select-a-provider' screen. This screen presents the user with a list of banking providers that they can connect to. Upon consenting to the end-user agreement, the customer will be redirected to the specified banking provider's mobile app or online banking page. For example, if you specify capitalone in the providers parameter, your customer will be sent to Capital One's banking page.
This configuration can be used if you already have identified accounts that your customer owns.
TO SPECIFY A LIST OF PROVIDERS
You can specify a list of providers using the following API call.
POST /v2/open-banking/authorisation-gateway-url
{
"redirect_url":"https://thisisbud.com/",
"providers": ["capitalone", "bankofamerica"]
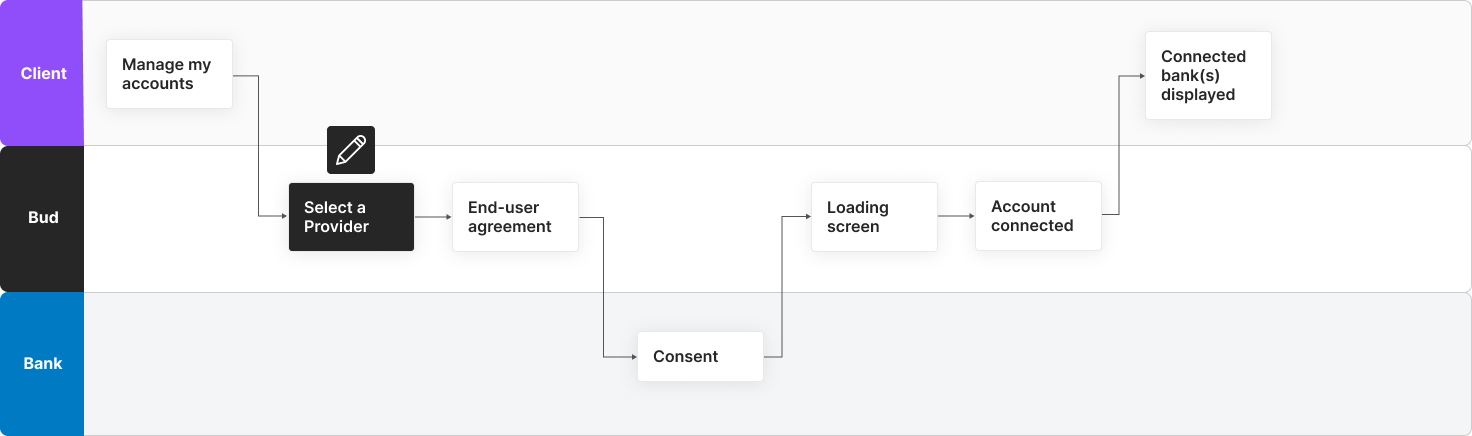
}In the 'providers' parameter, you can specify each banking provider you would like to show to your customer(s) and create a list of them, excluding others that are available via Buds API. For example, specifying capitalone and bankofamerica will display just those two banking providers when your customer reaches the "select-a provider" screen.
This configuration can be used when you already know your customer's list of banks to provide them with a more personalized experience.
Connect more accounts
You can add a button to allow the customer to ‘connect another account'. This can be used in conjunction with other configurations included in this guide.
TO ENABLE THE ‘CONNECT ANOTHER ACCOUNT' BUTTON
You can give your customer the option of connecting to more than one account using the following API call.
POST /v2/open-banking/authorisation-gateway-url
{
"redirect_url":"https://thisisbud.com/",
"connect_more_accounts_button": true
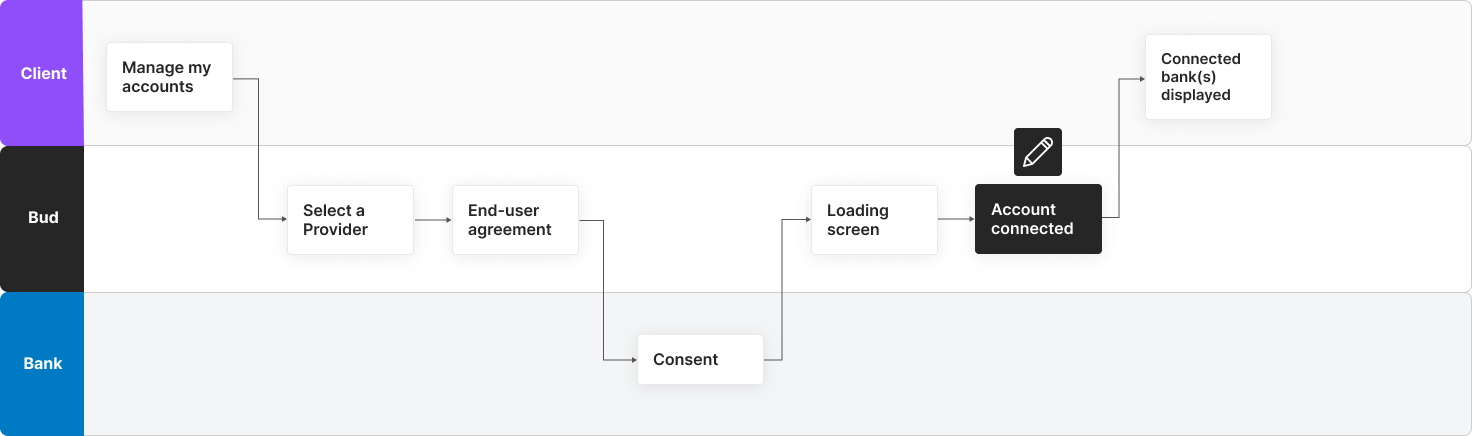
}Once your customer has successfully connected an account, by setting the connect_more_accounts_button to true, you will present an option to the customer to connect another account at the end of the Connect journey. They will then be taken to the ‘select-a-provider’ screen to choose the banking provider they want to connect to. This button can be used as many times as necessary.
Account Summary
Here, we give an overview of which configurations you can make to present the customer with their connected accounts at certain stages. The configurations include being presented to the customer when opening the journey or after connecting an account
ACCOUNT SUMMARY - BEFORE AND AFTER CONNECTING AN ACCOUNT

You can provide your customers with a summary of their accounts on the initial Bud screen using the following API call and after the connection process.
POST /v2/open-banking/authorisation-gateway-url
{
"redirect_url":"https://thisisbud.com/",
"initial_screen": "accounts_summary"
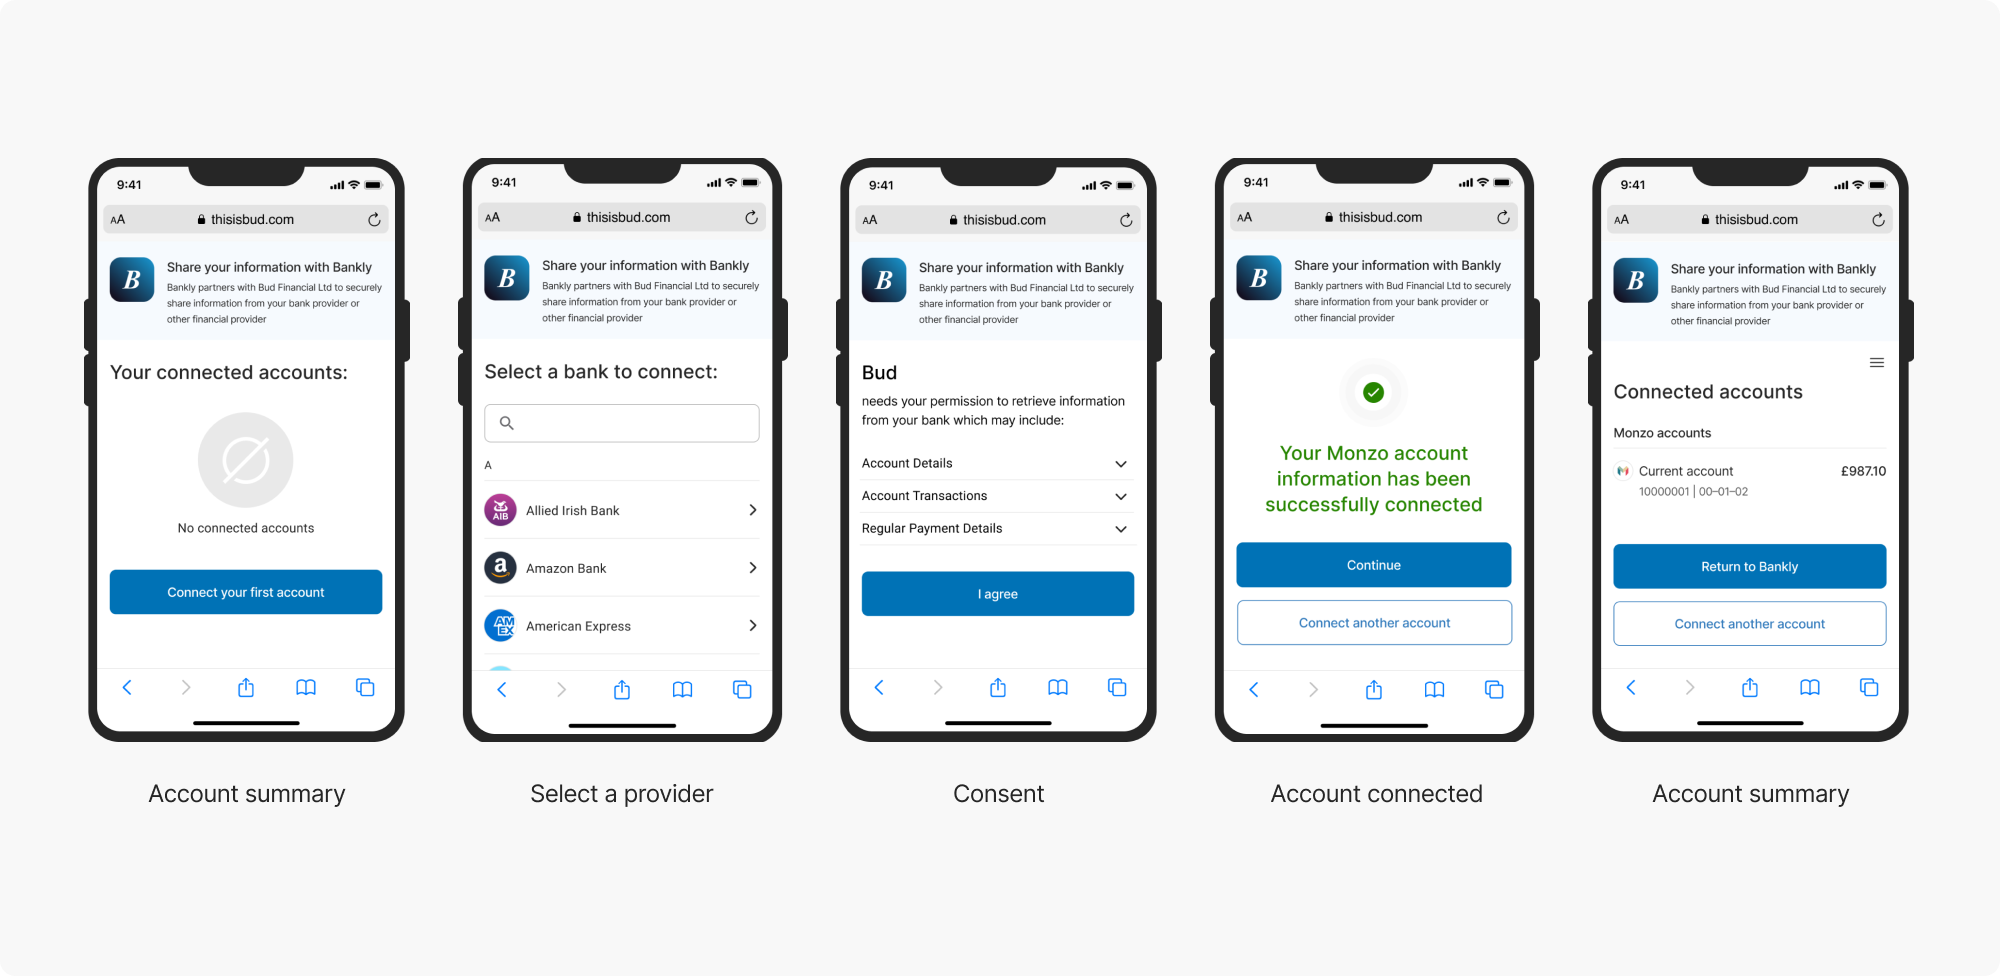
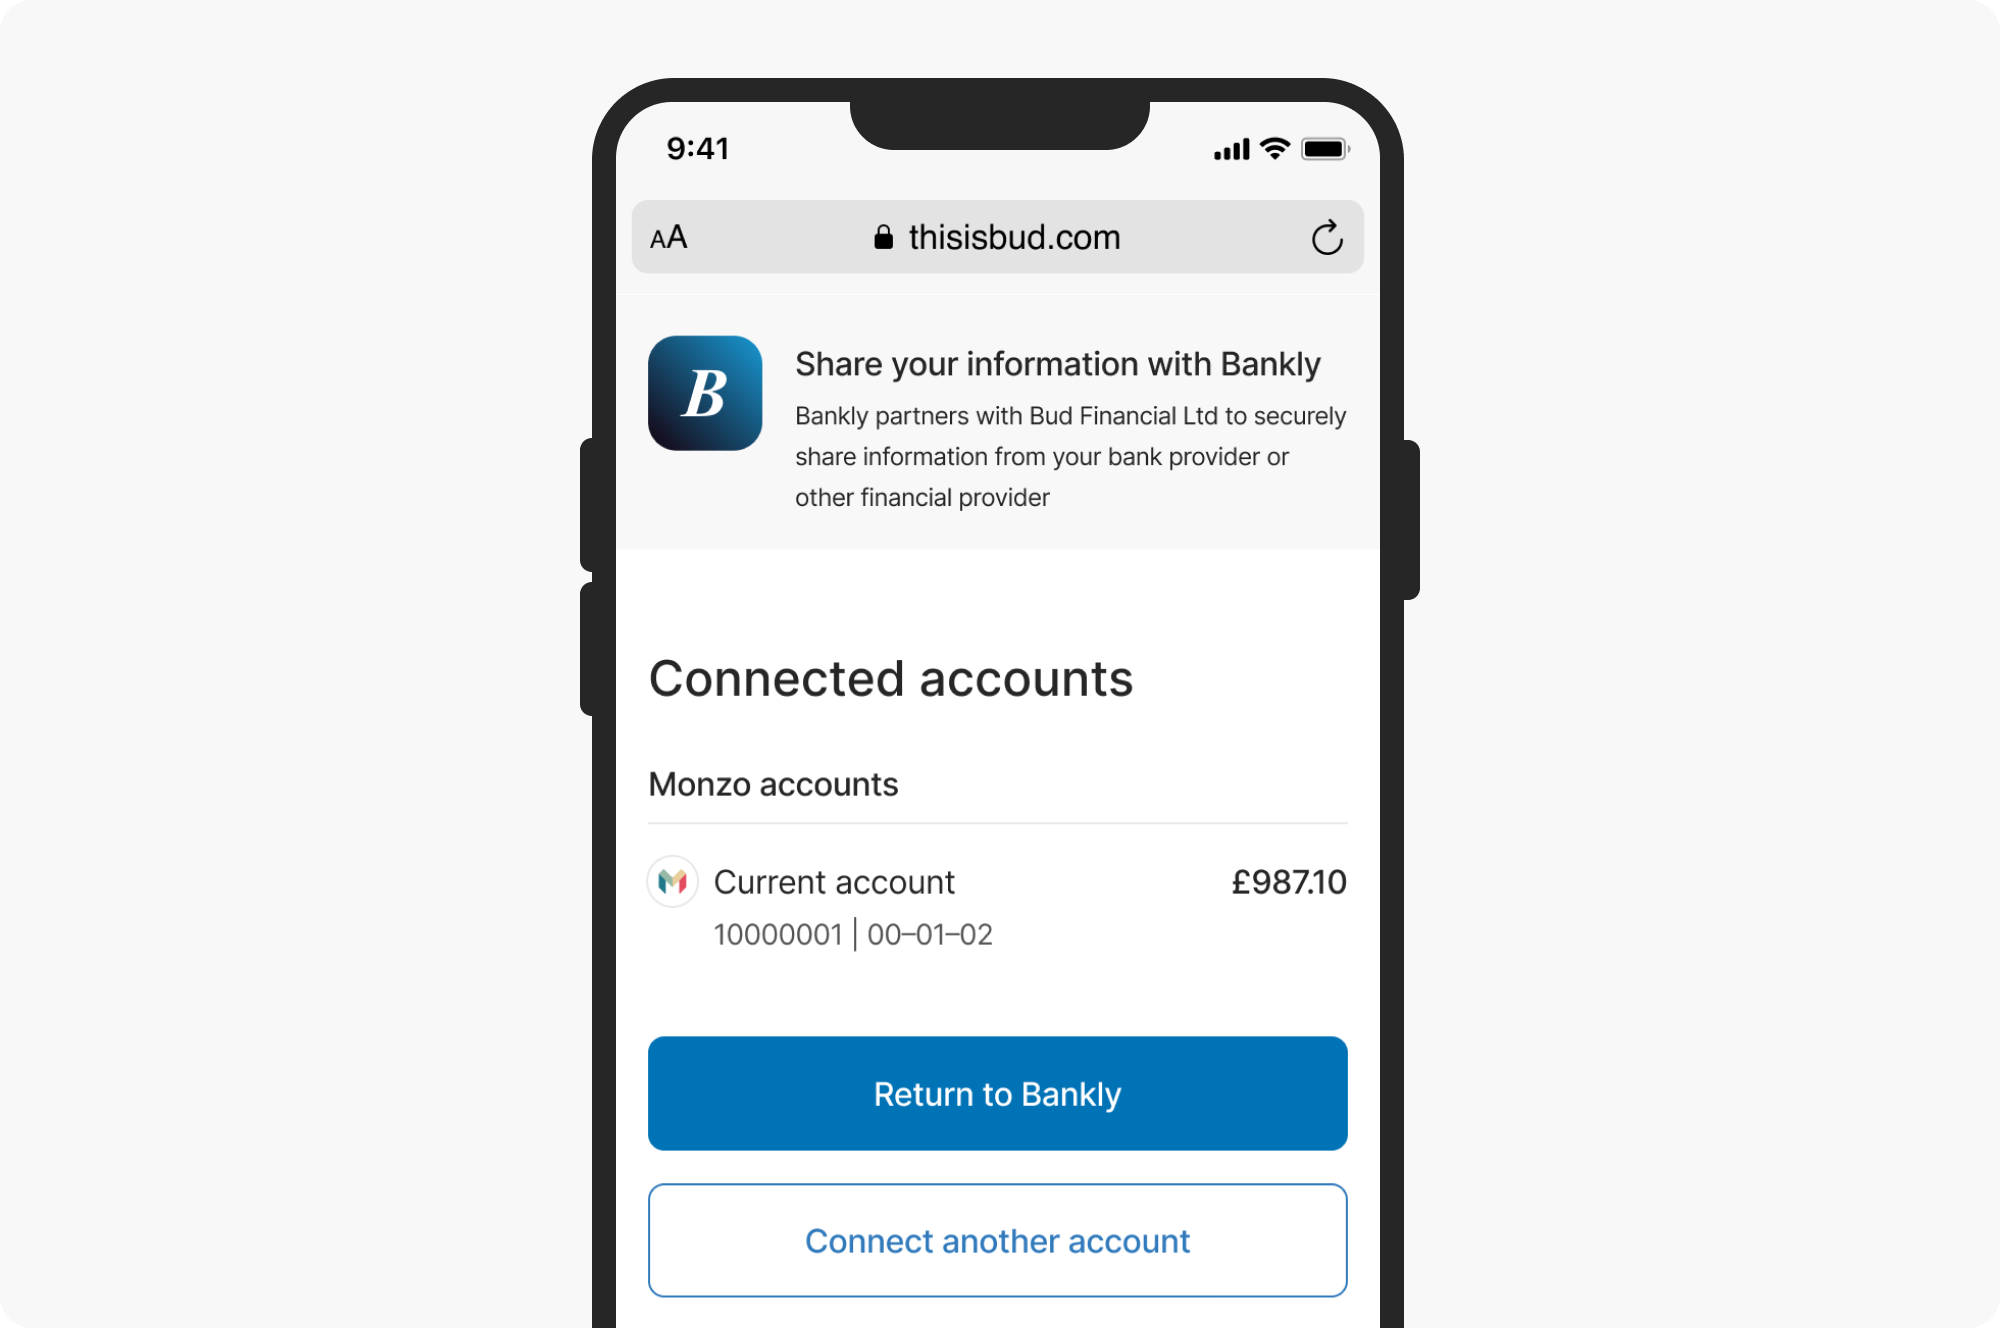
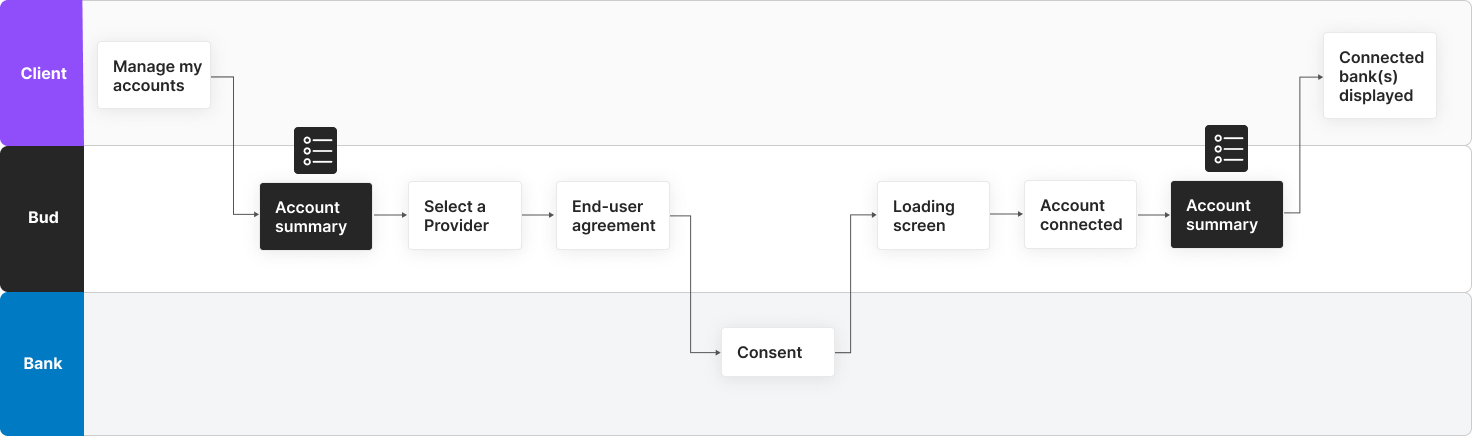
}By using the parameter initial_screen set as accounts_summary after your customer is directed to Bud to connect their accounts, they will be presented with an accounts summary screen before consenting or selecting a provider. If they have no accounts connected, they will be presented with the example screen below. If they do have accounts connected, they will be visible, and they will be given the option to connect more. You can use the summary screen here as a way for customers to view and manage their existing consents without needing to connect an account first.

ACCOUNT SUMMARY - AFTER CONNECTING AN ACCOUNT
You can provide your customer with a summary of their accounts after connecting an account using the following API call. The redirect URL will depend on your chosen URL; the example below is for illustration purposes.
POST /v2/open-banking/authorisation-gateway-url
{
"redirect_url":"https://thisisbud.com/",
"accounts_summary": true
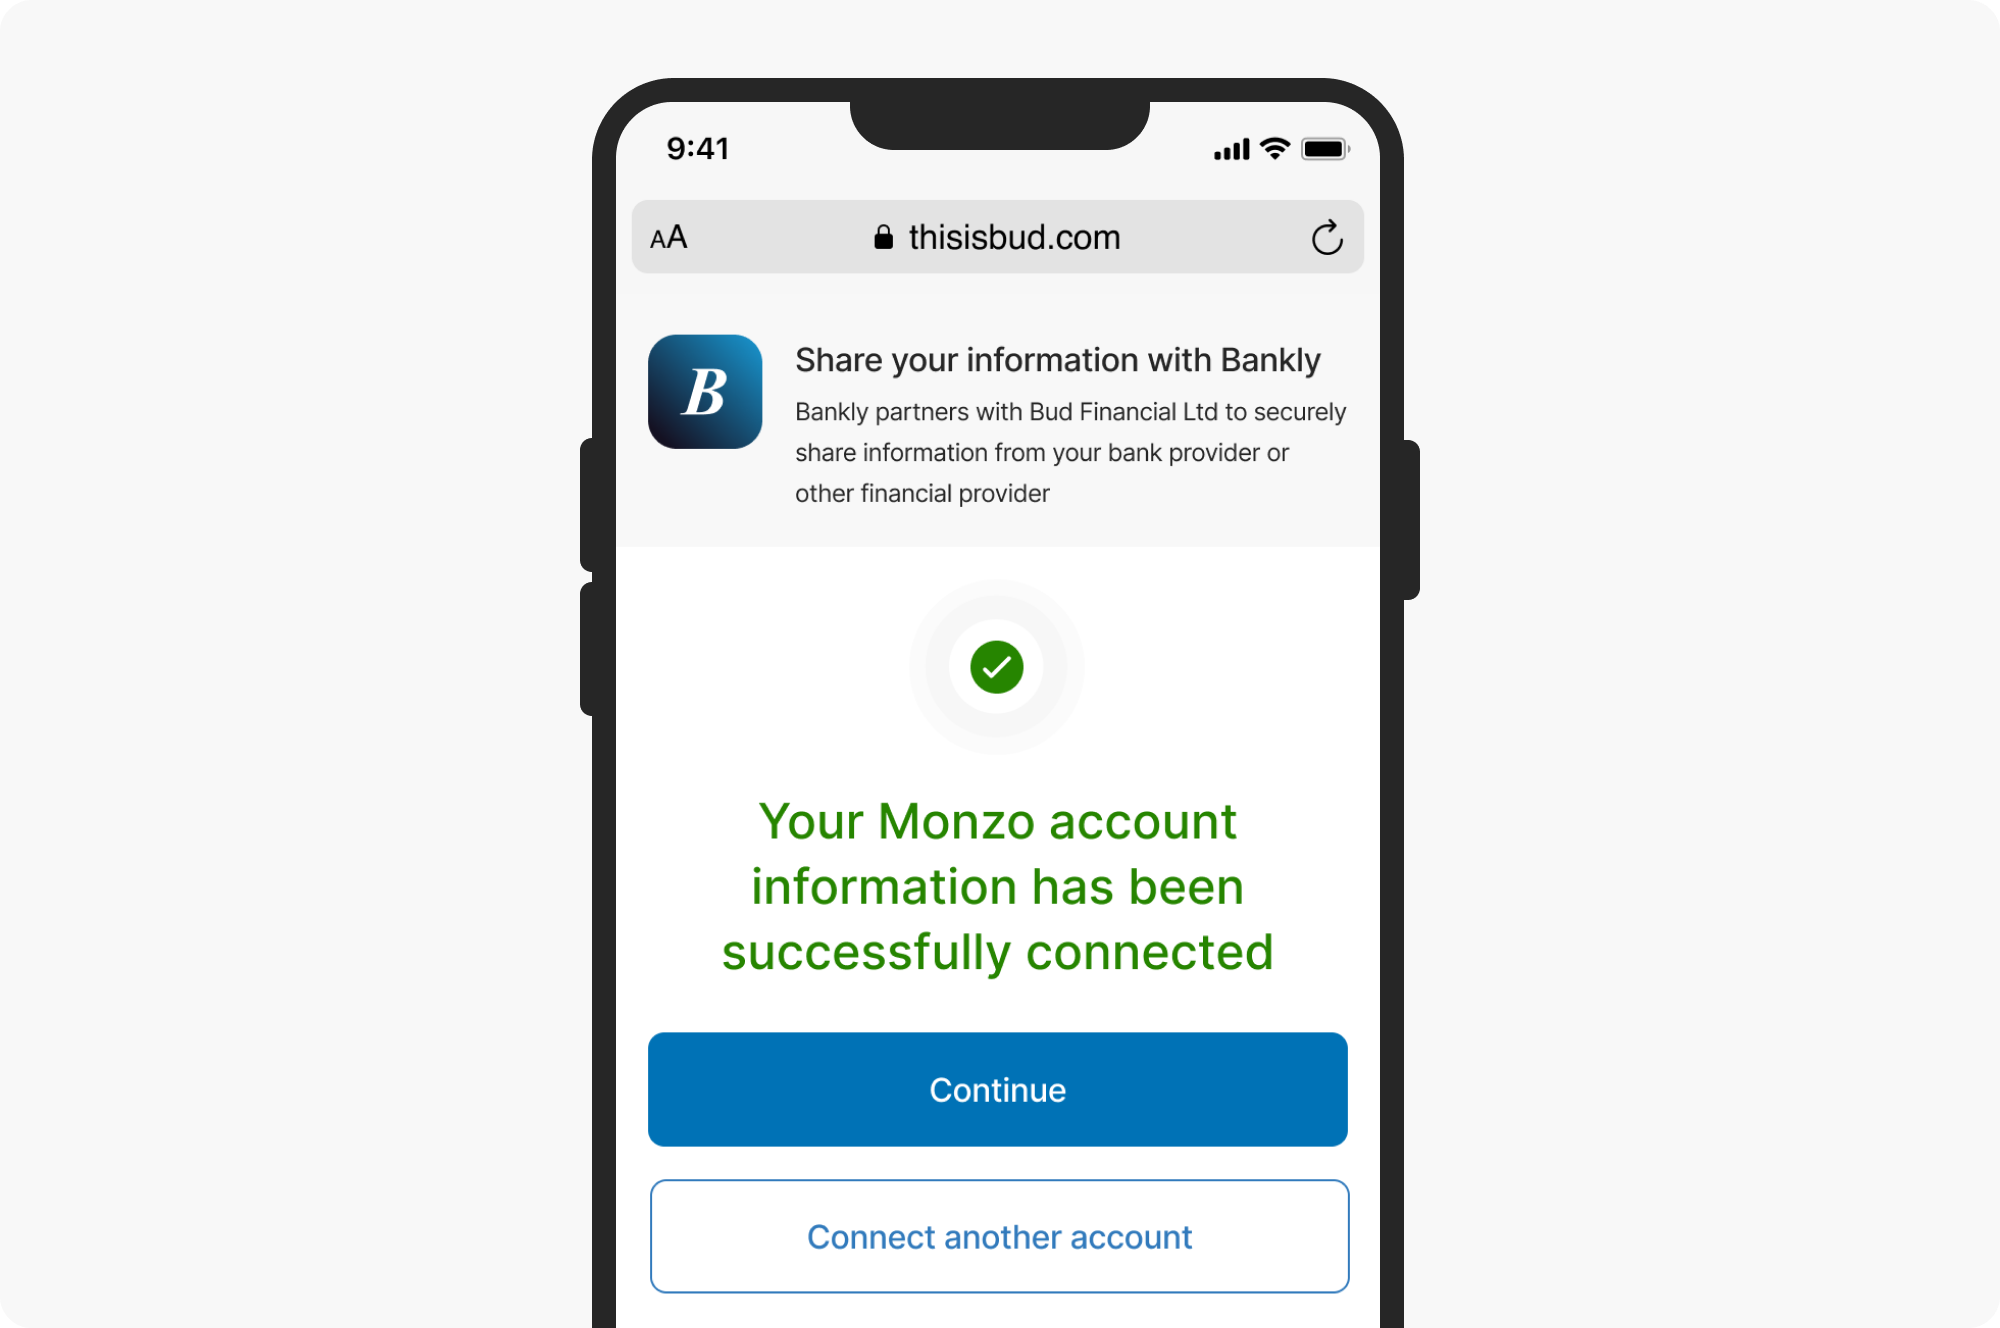
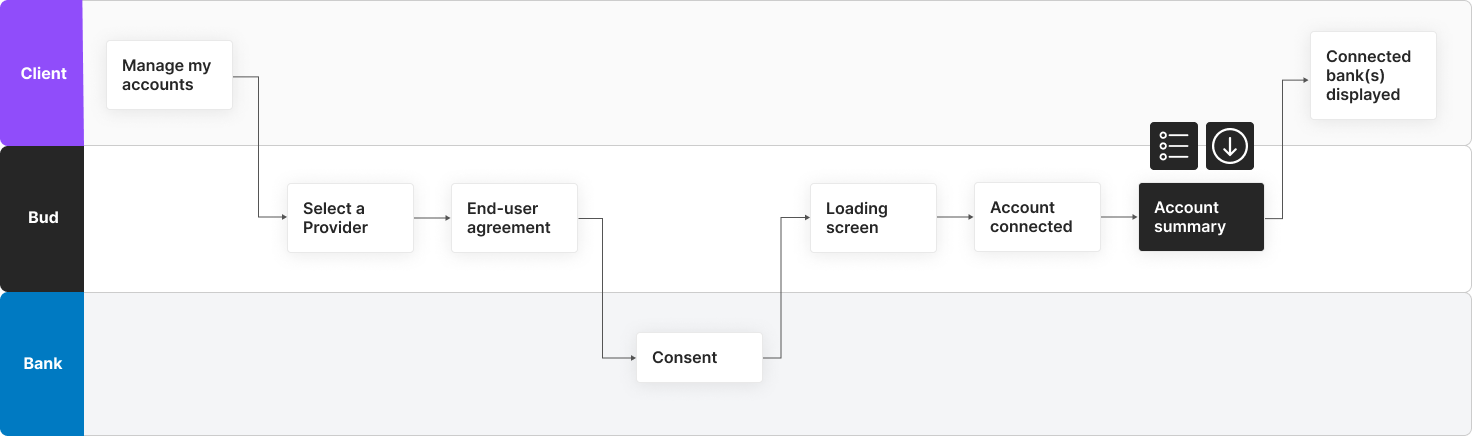
}By setting the parameter account_summary as true, you will show your customer a summary of their accounts after they have gone through the process of connecting their account. After they have successfully connected an account, the summary screen will be shown after pressing continue on the success page. Here, your customers can view and manage all of their consents for their connected accounts. If they wish to remove or add an account, they may also do this here.
This configuration can be used if you want the customer to be presented with all their account connections before returning back to your app. This can give the customer more control and visibility over their connected accounts.
Revoke Consents
ALLOW CUSTOMERS TO REVOKE THEIR GIVEN CONSENTS
You can provide your customer with a screen that allows them to list the given consent and request to revoke them.
POST /v2/open-banking/authorisation-gateway-url
{
  "redirect_url":"https://thisisbud.com/",
  "initial_screen": "revoke_consent"
}
By using the parameter initial_screen set as revoke_consent after your customer is directed to Bud, they will be presented with a screen that lists all the given consents, and an icon to revoke a consent.
If you have any questions, please contact us via the chatbot (bottom-right of screen 👉) or via a support request or check our FAQs.
Updated 10 months ago